
When my kids were little, we lived in the Hudson Valley of New York State, in a fixer-upper house that never quite got fixed up. When my son had an allergic reaction to cow's milk, we were advised to start him on goat's milk. Back in the day, goat's milk was not readily available at the local grocery and health food stores were few and far between. So, we schlepped each week , recyclable bottles in tow, to a local farmer for our supply. Eventually, it seemed to make sense to milk our own goats (it didn't make that much sense in mid-winter when we trudged to the barn twice a day to milk them, though). Anyway, we had LOTS of milk, so I made yogurt and cheese. It was kind of a production, with precise temperatures and timing and special equipment. The kids didn't even like it. A lot of work for very little payback.
Fast forward thirty-some odd years, and I am once again making yogurt and cheese (well, cream cheese, anyway), but this time with coconut milk and without all the paraphernalia. It's easy, fun, and, oh yes, delicious.
Fast forward thirty-some odd years, and I am once again making yogurt and cheese (well, cream cheese, anyway), but this time with coconut milk and without all the paraphernalia. It's easy, fun, and, oh yes, delicious.
Coconut Yogurt
Makes about 1 pint
This summer, my cousin Amy came for a visit and brought a rare and coveted gift, a container of Anita's Creamline Coconut Yogurt. I practically swooned when I tasted it and made up my mind to put in a standing order. Alas, Anita's is only available in New York City and they will not ship it no matter how hard you beg or grovel. When I looked up recipes for this yogurt, they all required hacking up baby coconuts to extract the meat. Way too labor-intensive, so I reconciled myself to no yogurt. But then I wondered what would happen if I used canned coconut milk, instead. And guess what, it's really, really good--not quite the amazing, sensual taste sensation of Anita's, but perfectly wonderful if you live in rural Maine and get to New York City maybe once every couple of years.
Ingredients
-Cream from the top of one can of coconut milk, plus enough coconut water from the can to make a smooth yogurt (I use Native Forest Unsweetened Organic Classic Coconut Milk. This brand contains organic guar gum, but when I tried this with a brand without guar gum, the texture was unacceptable. In any case, do not use reduced-fat coconut milk--unless you want to make kefir) If your kitchen is very warm, you can put the can in the refrigerator overnight before you use it so cream will thicken.
-Contents of one probiotic capsule
1. Scoop the cream from the top of the can and put it in a bowl. Add as much of the liquid from the bottom of the can as you like--if you want a thick, Greek-type yogurt, just add enough so you can stir the mixture; if you like traditional yogurt, add a little more liquid. Do not use the whole can or yogurt will not thicken properly.
2. Empty the contents of probiotic capsule into the cream and stir until well-combined. An immersion blender helps if there are lumps of coconut cream in the mixture.
3. Pour into sterile glass jar, cover, and place in a turned-off oven for 24 hours.
4. Refrigerate and enjoy!
Paleo Sour Cream
Makes about 1 pint
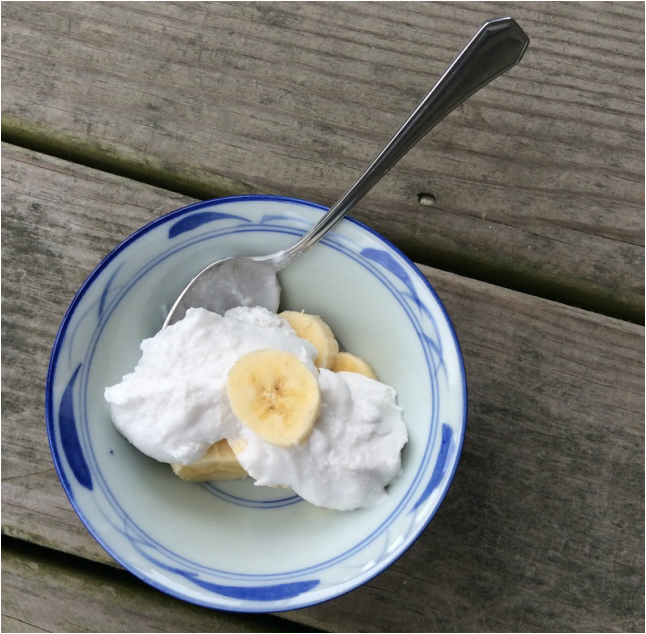
When my siblings and I were very young, sour cream and bananas was a favorite dinner choice. I don't remember if this was offered as the actual dinner, or maybe the alternative when we turned our noses up at what my mother put on the table (liver and onions, perhaps?). I actually loathed bananas, and this was the only way I would eat them. It still is, but now my sour cream is made with coconut milk. The bananas, however, are still made with bananas
( just slice them into a bowl and top with sour cream--voila, instant kid dinner. Or, even better, use coconut yogurt in place of the sour cream, add a tablespoon of raw organic hemp seeds, and you have a healthy adult breakfast).
Makes about 1 pint
When my siblings and I were very young, sour cream and bananas was a favorite dinner choice. I don't remember if this was offered as the actual dinner, or maybe the alternative when we turned our noses up at what my mother put on the table (liver and onions, perhaps?). I actually loathed bananas, and this was the only way I would eat them. It still is, but now my sour cream is made with coconut milk. The bananas, however, are still made with bananas
( just slice them into a bowl and top with sour cream--voila, instant kid dinner. Or, even better, use coconut yogurt in place of the sour cream, add a tablespoon of raw organic hemp seeds, and you have a healthy adult breakfast).
Ingredients
1 can coconut milk (see yogurt recipe for information)
1 TBS fresh-squeezed lemon juice
Sea salt to taste
1. Scoop cream from top of coconut milk into bowl
2. Add lemon juice and salt to taste and mix thoroughly
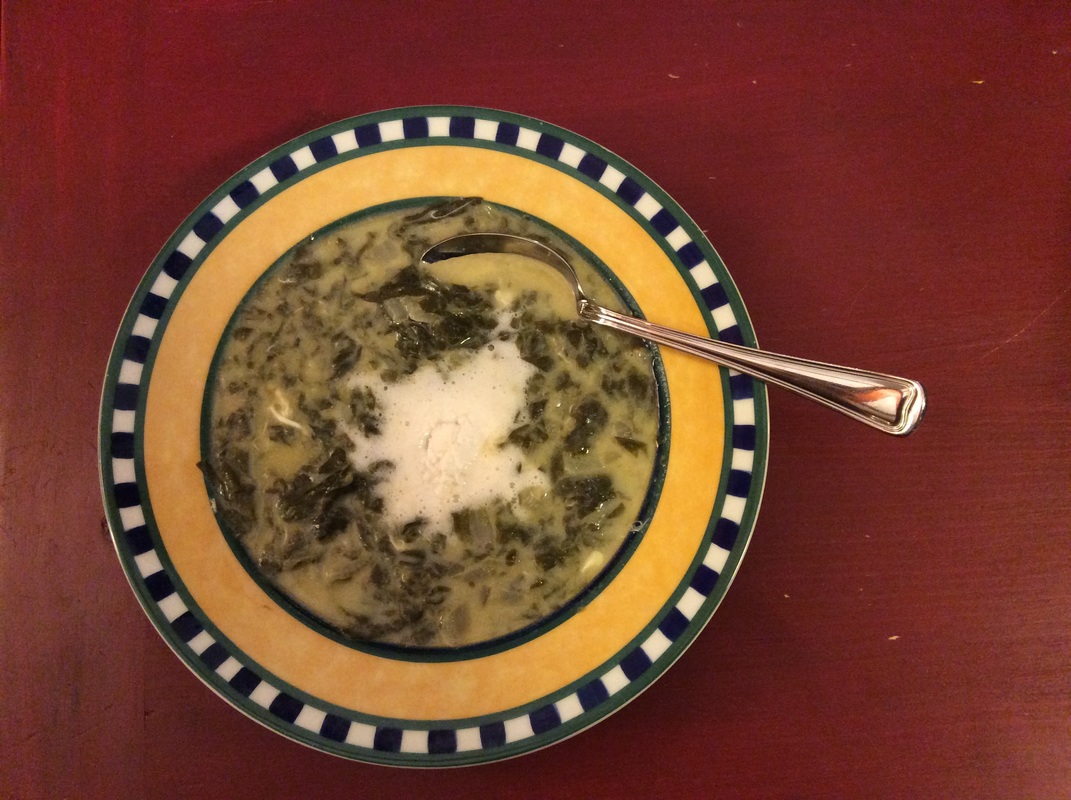
3. Use in any recipe that calls for sour cream (like my Aunt Honey's Sorrel Soup, see below)
1 can coconut milk (see yogurt recipe for information)
1 TBS fresh-squeezed lemon juice
Sea salt to taste
1. Scoop cream from top of coconut milk into bowl
2. Add lemon juice and salt to taste and mix thoroughly
3. Use in any recipe that calls for sour cream (like my Aunt Honey's Sorrel Soup, see below)
Paleo Cream Cheese
Ingredients
Same as for Paleo Sour Cream, above
1. Follow recipe for Paleo Sour Cream, above
2. Line a strainer with an unbleached coffee filter and place strainer over bowl, then add Paleo sour cream
3. Cover with a clean dish towel and leave on counter overnight so liquid can drain
4. Remove coffee filter and transfer to a small bowl. Refrigerate and use as you would any conventional cream cheese (yes, you can still have lox and bagels on Paleo--check out Elana Amsterdam's recipe for Paleo bagels on her website www.elanaspantry.com)

Aunt Honey's Sorrel Soup (Schav)
Serves 4
My mother was the oldest of 6 girls, and was 20 years older than her youngest sister, so I have several aunts who are not much older than I am. The following recipe, adapted for Paleo, is from my second youngest aunt, who always signs her letters to me FYAHWLY (from your Aunt Honey what loves you). As of mid-October, I still have sorrel (a lemony-tasting green) in the garden. It's a perennial and I planted it just for this soup (it also makes a great sauce for salmon).
Ingredients
3 medium onions, finely chopped
2 cloves garlic (I omit this, because garlic doesn't like me)
1/4 cup ghee
Sorrel leaves (remove stalks and large veins), coarsely shredded, approximately 8-10 cups
2 TBS vinegar (I use apple cider vinegar)
1 tsp lemon juice
Salt, pepper to taste
4 cups low sodium chicken stock (I use Imagine brand)
1 egg, beaten
Paleo sour cream (see above) to garnish
1. Sauté onion (and garlic, if using) in ghee until golden
2. Add sorrel leaves, and cook, covered, until wilted (about 5 minutes)
3. Add stock, vinegar, lemon juice, salt and pepper and cook, covered, about 30 minutes
4. When ready to serve, beat egg in a small bowl, add a little hot soup to the bowl and then return the mixture to the pot. Stir well. Do not allow the soup to boil or the egg to set.
5. Serve at once with a dollop of sour cream.


 RSS Feed